If you, as the instructor, wish to control the order in which students watch Yuja video content, you must embed those videos into Canvas rather than using the Yuja course channel (or course navigation item). Yuja videos can be embedded into any item in Canvas that uses the text editor (i.e., Content Pages, Discussions, Assignments, Quizzes, and Announcements).
The following is designed to guide users through the process of embedding Yuja video content into Canvas. Topics included within this guide are:
- Creating Canvas Items (where the videos will be placed)
- Embedding Videos from Yuja (placing the video)
- Viewing/Checking Embedded Videos (making sure they work)
This tutorial assumes you have already created video with Yuja or have uploaded existing video content to your Yuja account. If you currently do not have any video content to embed, please see the Yuja – Getting Started support guide for directions to upload existing video content to your Yuja account, or Yuja – Creating New Video for directions on how to create new videos with Yuja.
See attached resource below:
Download TutorialCreating Canvas Items
Before a video can be embedded from Yuja into Canavs, the video needs a place to live, or to be embedded into. Canvas has a Yuja tool that makes this process easy but the Canvas item (where the video will be embedded) must be created first.
STEP 1 – decide where you want this video to live, or be placed. The most common use of video in a Canvas course is lecture material. These videos should be embedded in a Content Page. The Content Page with the video is then added, or organized, into a module. This is a best practice for video lecture material for it allows students using mobile devices to easily view the content.
NOTE: you can embed video into other types of Canvas items, and organize those items within a module. However, all videos used for lecture should be placed within a content page.
STEP 2 – Create the Canvas Item. Items in Canvas are usually organized within Modules. This is what allows you, the instructor, to control what videos are viewed by students and when. If your course does not have any modules, you will need to create one before creating the canvas item.
To create a new module: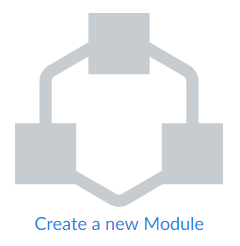
- Open the Modules page by clicking on Modules within the course navigation column.
- There are two ways to create your first module, the “Create a new Module” link in the middle of the screen (see right) or the +Module button in the top-right corner of the screen. Either will open the Add Module window.NOTE: after you create your first module, only the +Module button is visible when creating additional modules.
- Add the name for the module to the text box.
- Click Add Module to continue.
To create the item directly within a module:
- At the top of the module, on the right side, is a “+” button, or a button with a plus symbol in it (see below). This button allows you to create new items within that module. Click the “+” button to continue.

- From the window that appears, locate and click the pull-down menu that currently says “Assignment”.
- Select Content Page from the menu that appears.
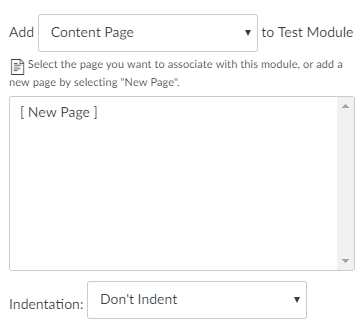
- The content box below the pull-down will change to reflect any/all content pages currently in your course. The top option in this box is [New Page]. Click on [New Page]
- Below the content box is a text box and another pull-down menu. Name the page in the text box and select any module indenting options with the pull-down menu.NOTE: the page name is what the students will see in the module list. It is best to use the name of the video, or the title of the lecture, as the Page Name.
- Click Add Item when finished.
All new items added to a module are placed at the very end, or bottom, of that module. You can drag the item up/down within the module to reorder items. You can also create different types of items within a module by using the steps listed above, except you will need to select the desired item (other than Content Page) from the pull-down menu.
Embedding Videos from Yuja
Embedding a video from Yuja places the video directly into the item, which students can play/watch without leaving the item or the Canvas course.
Advantages:
- Controlling the placement and timing of videos students can watch (what they watch and when)
- The ability to organize video content along-side other instructional materials
- Students can view embedded videos from their mobile devices
- Embedded items persist as you copy the course form semester to semester
- Embedded items may be used along-side text and images within the same item
Disadvantages:
- Embedding videos is a manual process (i.e., every video they wish students to see must be embedded into a Canvas item)
- Changing or updating videos requires you to edit the item and replace the video
To embed a Yuja video into a Canvas item, you first need to edit the existing item. You do this by locating the item within the module is had been placed and clicking on the name of the item.
When the item opens, locate and click on the Edit button. This is usually located in the top-right corner of the page. The editor will appear with different options depending on the type of item you are editing. Since best practice is to embed videos into Content Pages, that process is demonstrated below.
The page editor contains a text box at the top of the screen, a large text editor in the middle of the screen, and a Save button at the bottom of the screen (see below).
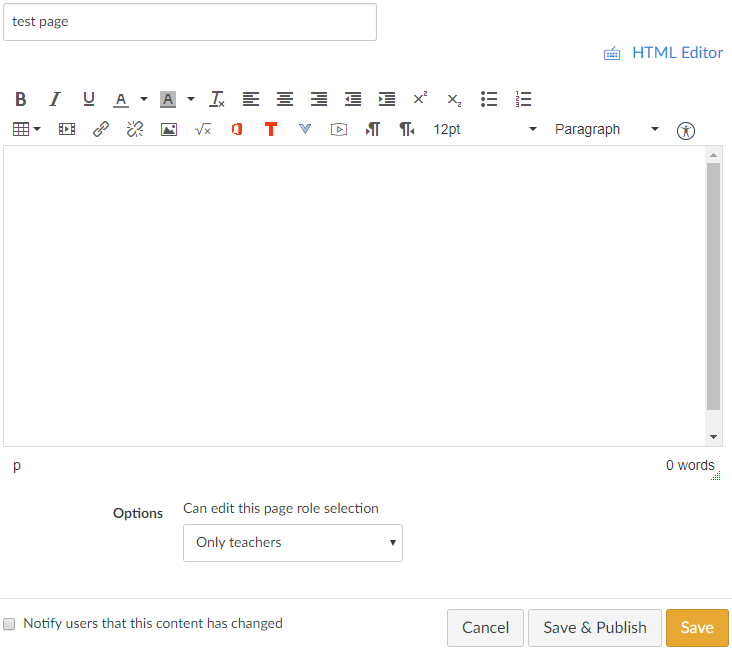
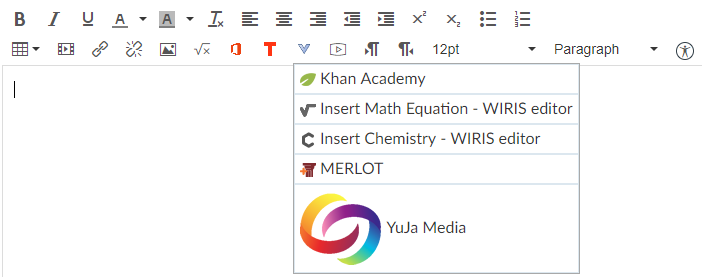
You will use the text editor to embed your videos. Within the text editor tool bar is a blue carrot/arrow/triangle pointing towards the bottom of the screen called “More External Tools” (see below). Clicking this icon opens a menu with additional tools you can use. Select Yuja Media to start the embedding process.
A new window will appear with two sections. The top section allows you to upload video to your Yuja account. The bottom section allows you to choose the video you wish to embed into the page (see below). The media chooser displays four videos at a time with a Load More button at the bottom of the window. At the top of the media chooser section is a search bar. If you have several videos on your Yuja account, you will use the search bar to locate your video by video title. If you do not have many videos on Yuja, you can use the Load More button to locate your video.
NOTE: you may have to scroll down in the Media Chooser window to see this button.
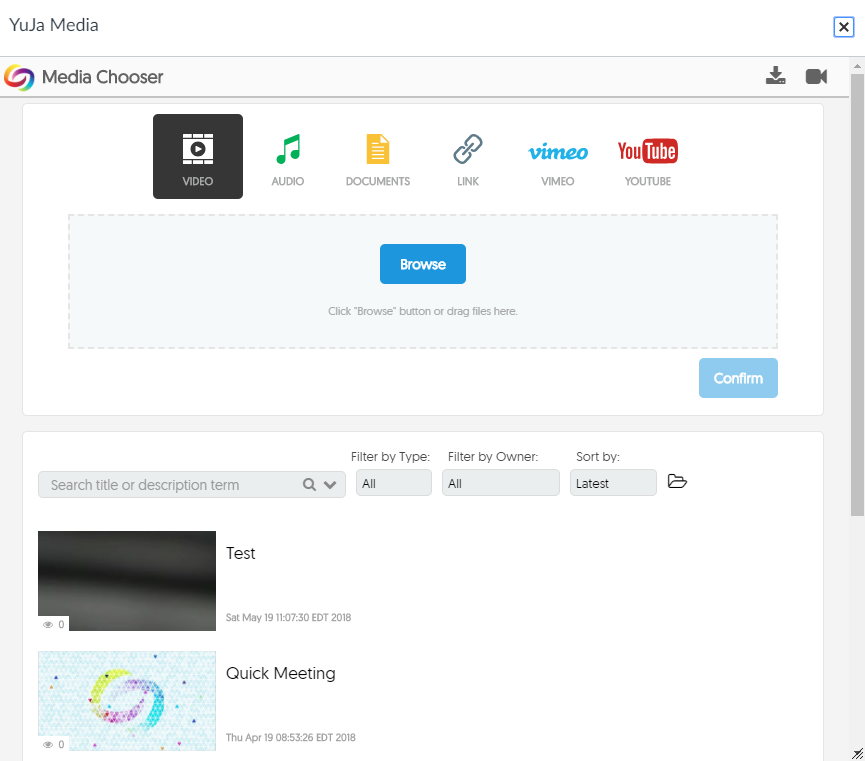
When you locate the video, click on it to embed the video into the page. The video will embed wherever the cursor (blinking vertical line) is in the text editor. If you have a specific location on the page you wish the video to be place, you must click on that area in the text editor before starting the embedding process.
If you wish to combine text and video onto the same page, it is best to type out the text content before embedding the video. When creating your text content, leave a blank line (i.e., press enter/return twice) to indicate where the video will be placed. This gives you an area to click on before starting the embedding process and provides space above and below the video so the video does not interfere with the text.
When finished, click Save or Save and Publish (depending on your need).
Viewing/Checking Embedded Videos
Embedding is different than a Yuja Course Channel in that it does check student enrollment before playing the video. This means you can check/view the content through Student View to ensure students see what you want them to see.
NOTE: before you see this content through Student View, the item and the module it resides in must be published.
To open Student View:
- Click on Settings in the course navigation column (located at the bottom of this column)
- Depending on the size of your computer screen, you will either see a column of links/options on the right side of the screen or at the bottom of your scree (requires scrolling). The second option is called Student View
- Click on Student View
- You will be taken to the course home page, a pink/purple outline will appear on your screen, and two buttons are in bottom-right corner of the screen (Reset Student and Leave Student View)
- Navigate through the course as if you were a student to ensure students see the content as you intended.
- Click Leave Student View to return to your instructor account
If you encounter an issue with a course item while using the Student View, leaving the student view keeps you in the location where the issue is located. This allows you to quickly address the issue without having to navigate back to it.